
Showing posts with label Bomar hatches. Show all posts

Monday, November 3, 2014

Hatches, I've Got Your Hatches Right Here

The installation of the newly refurnished and revitalized hatches has begun in earnest. Boy oh boy does having shiny hatches make a difference. The refurbishment project was undertaken in an attempt to protect the frames from deterioration but is it okay to just be a bit shallow and admit that the fact they look beautiful makes me happy?


The fact that they are being installed on a freshly painted cabin top helps with the aesthetic appeal. The down side to this is that there is still painting to be done on the deck and bow so what we have now is a shiny cabin top which makes the rest of the decks look really, really tired. This means more taping (which takes a lot longer than you would think), more painting (again with the time sink) and yet more polishing and waxing of said paint. 

It is my secret fear that all of this obsessive spit and polish will result in a deck so slippery that we end up shooting crew members off the side of the boat like penguins on an iceberg,

 Oxidized paint is ugly but its also grippy. I do think we will be revisiting the nonskid sooner rather than later as with the rest of the deck so pristine and slick, I want the nonskid areas to REALLY be nonskid. 

The good news is that either way, the cabin top is just about ready to have the turtle shell and deck hardware installed and that is another milestone to tick off our list.

Meanwhile, Kitty likes to check up on the progress and tell us what she thinks of the work thus far. She also likes to provide commentary on her dad. She will proudly tell you that her daddy "is a worker". She holds workers in high esteem whether they be her family, or boat yard workers, road construction crews basically anyone who uses a tool in their daily work is a "worker" and she holds them in very high regard. Anytime she has a toy or household item which is damaged, she brushes it off and says it's okay because "Daddy can fix it, He is a good fixer. he can fix anything." Now to help her see that SHE can be a worker who fixes things too.


Sunday, October 26, 2014

Hatching A Plan....

Tackling the deck sounds so straight forward. Just slap on on new deck hardware, a a little butyl tape and get on with it. But this is our home we are talking about and she hasn't been through a really thorough revitalization and at 30 years old, it's way past time. Also, Mark is not called Captain Perfecto without good cause. Due to these factors, we figured if we are going to take the time to refit and refurbish the top sides, might as well get it ALL in tip top shape while we have the boat apart.

While we have the hatches off to paint the decks, we thought it best to get our hatches in the best shape we possibly can before rebedding and reinstalling them. I documented how we managed to save the lenses previously with polishing, now it's time to get the frames themselves in the best shape possible.
Hatch frame before anodizing and refinish. I think you can see why we had to do something....

We sent the frames out to have them bead blasted and anodized with a hard finish. We got them back recently and well, while they were improved we still had concerns. The finish achieved was a bit rough and pitted. To us it was more than a cosmetic issue. We are were concerned that those tiny little pits and crevices would provide an entry for salt water to make it's way into the structure and just chew through the aluminum. We really do not want to have to replace these at over $1,000 a piece so we got to thinking...

After thinking it through for a bit, Mark got busy.

First off,  he carefully sprayed the frames with a coating ofWest System epoxy. We seriously love West Systems. So so many uses. Usually West Systems won't adhere to aluminum but we had enough pitting to provide "grip" for the epoxy. We let it cure to a hard finish before sanding it with 220 grit sand paper. Add another thin coat of West Systems, cure, sand and repeat for a total of 4 coats.

  Now we were faced with yet another challenge. West Systems is wonderful stuff, but it is not UV resistant. Paint however IS UV resistant. The question now was what pain

We knew we wanted to keep the frames silver. We just assumed we would pick up some Awlcraft 2000 in silver. Not so fast peeps. Silver in either Awlgrip or Awlcraft is special order so there is the time element. Then there was another big tick against it in this application. It is also $175.00 a quart.
Ouch,

After having a good, long think about it and reading all the info we could on various paints we decided to bite the bullet and go with Paint Shop Duplicolor in silver. $25 is a lot easier to swallow than $175. Our worry is whether or not it will adhere well over time to the epoxy. We are going to watch and will give a report in a few months time. If you are thinking of going this route, wait a bit and see how our paint holds up. If it all goes horribly wrong, you can skip it and just thank us for doing you a favor. That's us, doing the stupid so you don't have to,

While the final coat of West System was still tacky, Mark applied a primer coat of paint. After letting it dry completely, he applied 3 additional coats of paint. We have found through trial and error that many thin coats gives a much superior finish to fewer, heavier coats.

After the final coat of paint has had a good cure,  a bit of wet sanding with 400 grit paper and we are ready to add our final clear coats. We once again busted out the Interlux Perfection Plus and applied 2 coats. One of the ON label uses of Interlux is as a clear coat for painted finishes and it offers really great UV protection so fingers crossed it all goes as we think it will.
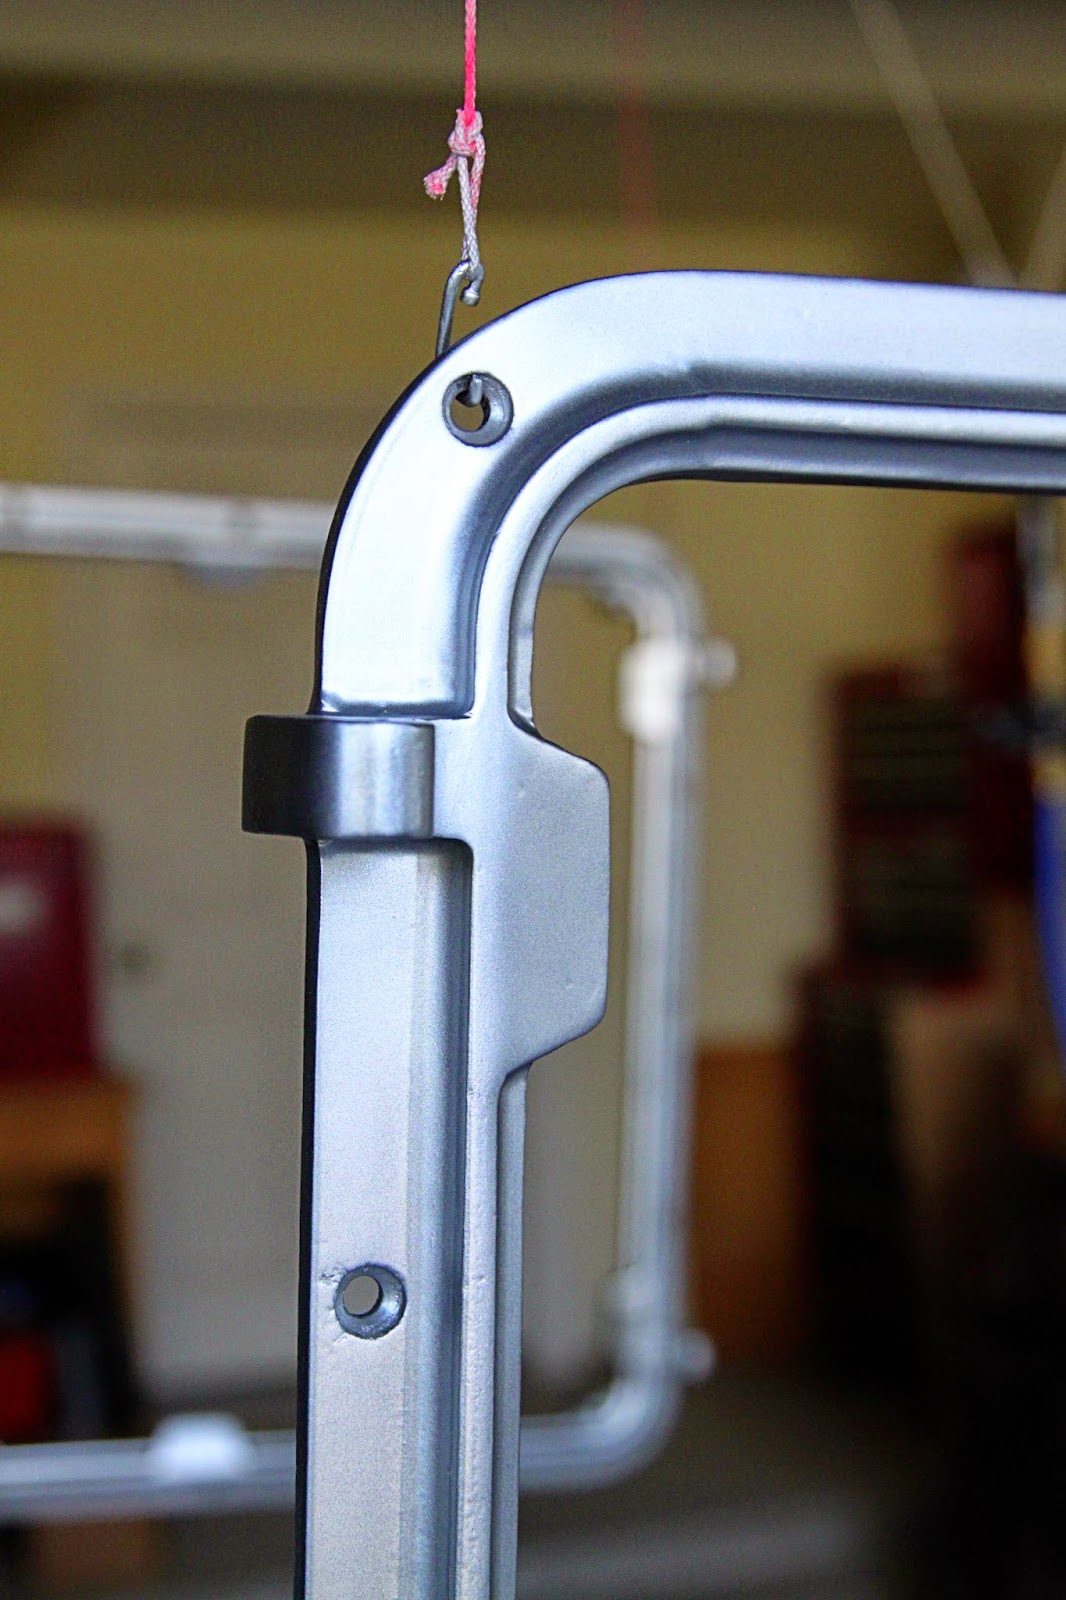
And Voila!
Newly anodized, sprayed with epoxy, sanded and painted, Just awaiting one final clear coat then fingers crossed!