Showing posts with label boat maintenance. Show all posts

Monday, November 3, 2014

Hatches, I've Got Your Hatches Right Here

The installation of the newly refurnished and revitalized hatches has begun in earnest. Boy oh boy does having shiny hatches make a difference. The refurbishment project was undertaken in an attempt to protect the frames from deterioration but is it okay to just be a bit shallow and admit that the fact they look beautiful makes me happy?


The fact that they are being installed on a freshly painted cabin top helps with the aesthetic appeal. The down side to this is that there is still painting to be done on the deck and bow so what we have now is a shiny cabin top which makes the rest of the decks look really, really tired. This means more taping (which takes a lot longer than you would think), more painting (again with the time sink) and yet more polishing and waxing of said paint. 

It is my secret fear that all of this obsessive spit and polish will result in a deck so slippery that we end up shooting crew members off the side of the boat like penguins on an iceberg,

 Oxidized paint is ugly but its also grippy. I do think we will be revisiting the nonskid sooner rather than later as with the rest of the deck so pristine and slick, I want the nonskid areas to REALLY be nonskid. 

The good news is that either way, the cabin top is just about ready to have the turtle shell and deck hardware installed and that is another milestone to tick off our list.

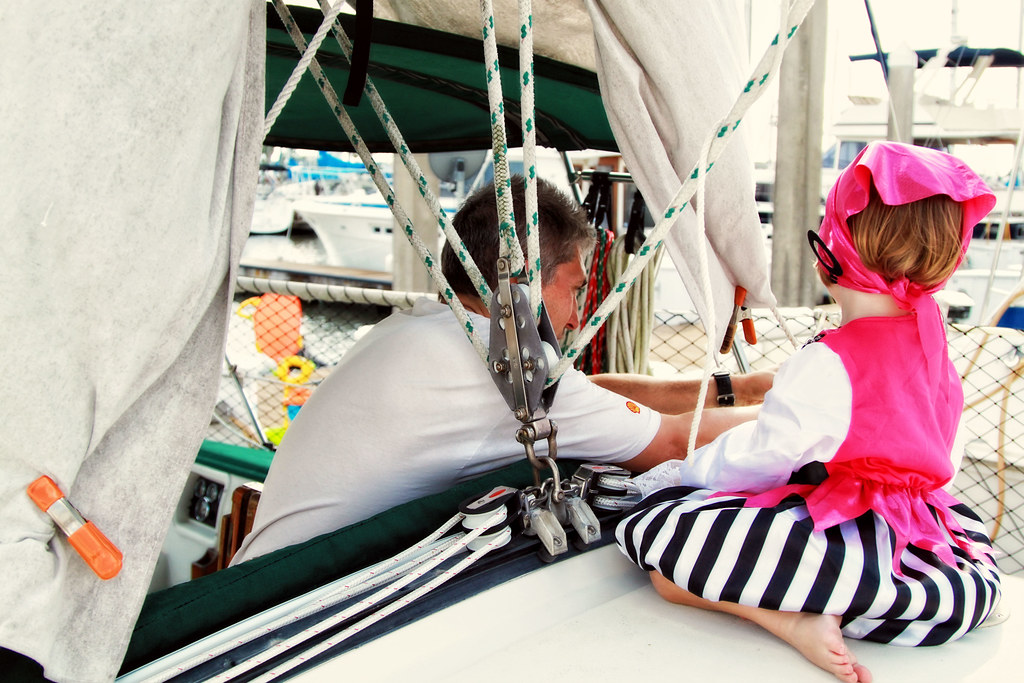
Meanwhile, Kitty likes to check up on the progress and tell us what she thinks of the work thus far. She also likes to provide commentary on her dad. She will proudly tell you that her daddy "is a worker". She holds workers in high esteem whether they be her family, or boat yard workers, road construction crews basically anyone who uses a tool in their daily work is a "worker" and she holds them in very high regard. Anytime she has a toy or household item which is damaged, she brushes it off and says it's okay because "Daddy can fix it, He is a good fixer. he can fix anything." Now to help her see that SHE can be a worker who fixes things too.


Sunday, October 26, 2014

Hatching A Plan....

Tackling the deck sounds so straight forward. Just slap on on new deck hardware, a a little butyl tape and get on with it. But this is our home we are talking about and she hasn't been through a really thorough revitalization and at 30 years old, it's way past time. Also, Mark is not called Captain Perfecto without good cause. Due to these factors, we figured if we are going to take the time to refit and refurbish the top sides, might as well get it ALL in tip top shape while we have the boat apart.

While we have the hatches off to paint the decks, we thought it best to get our hatches in the best shape we possibly can before rebedding and reinstalling them. I documented how we managed to save the lenses previously with polishing, now it's time to get the frames themselves in the best shape possible.
Hatch frame before anodizing and refinish. I think you can see why we had to do something....

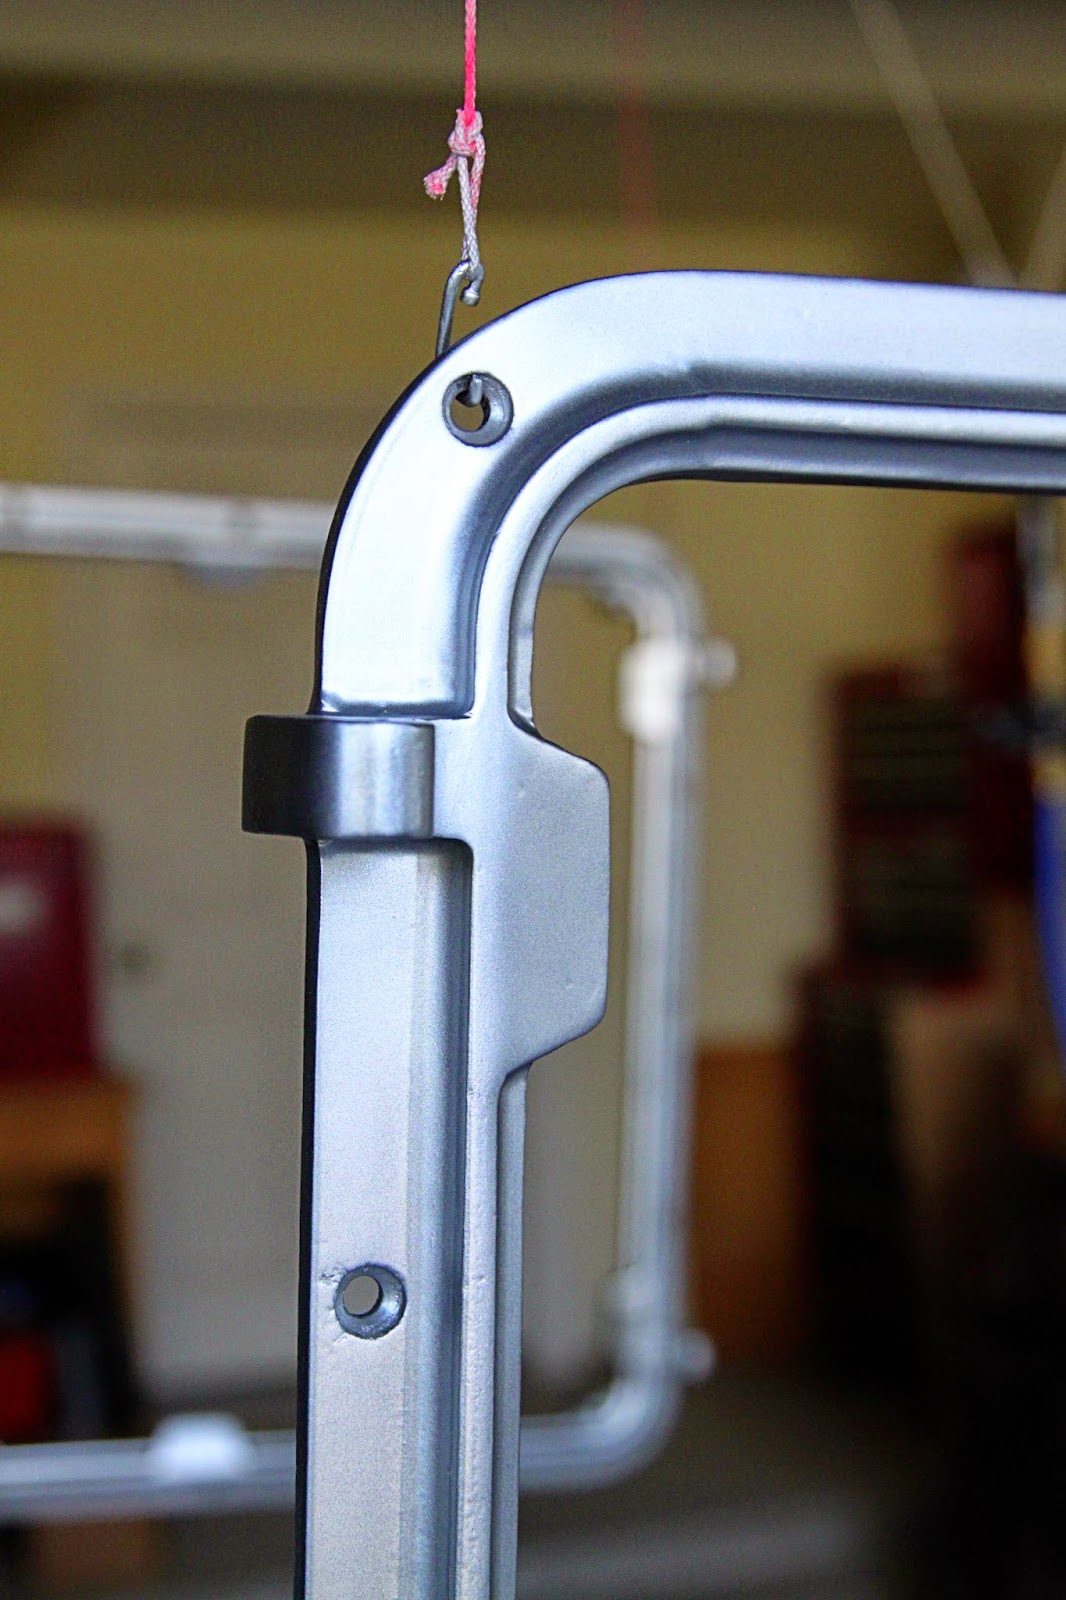
We sent the frames out to have them bead blasted and anodized with a hard finish. We got them back recently and well, while they were improved we still had concerns. The finish achieved was a bit rough and pitted. To us it was more than a cosmetic issue. We are were concerned that those tiny little pits and crevices would provide an entry for salt water to make it's way into the structure and just chew through the aluminum. We really do not want to have to replace these at over $1,000 a piece so we got to thinking...

After thinking it through for a bit, Mark got busy.

First off,  he carefully sprayed the frames with a coating ofWest System epoxy. We seriously love West Systems. So so many uses. Usually West Systems won't adhere to aluminum but we had enough pitting to provide "grip" for the epoxy. We let it cure to a hard finish before sanding it with 220 grit sand paper. Add another thin coat of West Systems, cure, sand and repeat for a total of 4 coats.

  Now we were faced with yet another challenge. West Systems is wonderful stuff, but it is not UV resistant. Paint however IS UV resistant. The question now was what pain

We knew we wanted to keep the frames silver. We just assumed we would pick up some Awlcraft 2000 in silver. Not so fast peeps. Silver in either Awlgrip or Awlcraft is special order so there is the time element. Then there was another big tick against it in this application. It is also $175.00 a quart.
Ouch,

After having a good, long think about it and reading all the info we could on various paints we decided to bite the bullet and go with Paint Shop Duplicolor in silver. $25 is a lot easier to swallow than $175. Our worry is whether or not it will adhere well over time to the epoxy. We are going to watch and will give a report in a few months time. If you are thinking of going this route, wait a bit and see how our paint holds up. If it all goes horribly wrong, you can skip it and just thank us for doing you a favor. That's us, doing the stupid so you don't have to,

While the final coat of West System was still tacky, Mark applied a primer coat of paint. After letting it dry completely, he applied 3 additional coats of paint. We have found through trial and error that many thin coats gives a much superior finish to fewer, heavier coats.

After the final coat of paint has had a good cure,  a bit of wet sanding with 400 grit paper and we are ready to add our final clear coats. We once again busted out the Interlux Perfection Plus and applied 2 coats. One of the ON label uses of Interlux is as a clear coat for painted finishes and it offers really great UV protection so fingers crossed it all goes as we think it will.

And Voila!
Newly anodized, sprayed with epoxy, sanded and painted, Just awaiting one final clear coat then fingers crossed!


Saturday, October 11, 2014

How To Polish Deck Hatch Lenses (or how to save a couple of thousand dollars)

Our Bomar deck hatches had seen better days. Despite using hatch covers, 30 years of sun and salt water had done their damage. One of the danged nabbit seagulls managed to hit an uncovered hatch lens with its caustic poop and even though it was on the lens for a brief time before being washed off, it did a number on the Lexan lens. Makes you wonder what they eat. The aluminum frames were in an okay condition but were starting to show signs of degradation.

Since Mark's goal is to not only improve the functionality of Ceol Mor but to also have her looking "like a million dollar yacht" we had a choice to make. Replace the hatches- at over $1,000 a pop. We have 3 large hatches and two smaller ones. Over $4,000 to replace. Next please. Replace the lenses at a couple of hundred bucks a piece for our large hatches. Refurbish them ourselves and hope they seal as well as the original lenses. We are on the downhill side of a massive refit. I no longer am willing to "hope" for anything. Since we want to only have her LOOKING like a million dollar yacht and lack the funds to actually MAKE her a million dollar yacht, we thought the best plan of action was to try to refurbish them ourselves since they were structurally sound, just ugly.

Before. Yuck.
After removing the deck hatches, we sent the frames off to be re-anodized. The quote was $175.00 in total for 4 hatch frames (the bottom frames only). While they are off being bead blasted and re-anodized, it was time to see if we could save the lenses. We could and we did. Here's how we did it.

Equipment needed- Wet Sandpaper in 320, 600 and 1000 grit
                                 A water source.
                                 Makita Variable Speed Electronic Sander
                               PRESTA Ultra Cutting Creme                              
                                Presta- Chroma Ultra Polish
                                 A cutting/buffing pad
                                 A polishing pad

The first step was to wet sand with the 320 grit wet sand paper to remove crazing and scratches. Don't get too aggressive and take your time making sure you have a constant flow of water. You want to remove the scratches, not add new ones.

Once you are happy, repeat the process of wet sanding with the 600. Then again with the 1000 grit. Just take your time and keep the surface wetted. Mark had a hose, with a sprinkler nozzle, to rinse down the work-piece and remove sanding residue throughout the wet sanding.

Once you have wet sanded thoroughly, it's time for power tools. We really like the Makita as it is pretty much a work horse and has been pressed into service regularly and it just keeps keeping on.

We applied the cutting creme directly to the lens, working in small areas. Some folks swear by applying it to the pad itself- many ways to skin a cat I suppose. Having priced out replacement lenses, we thought it best to go slowly and carefully working on a small area at a time. Regardless, this is one time when the brand of products matters. The Presta products really are all that, so if you are going to take the time to do this, take the extra time to source the Presta products. Remember to let the polisher do the work for you and don't apply too much pressure. Slow and steady matters here.

Once you have thoroughly worked the cutting creme, gently clean the lens with water and a non abrasive cloth. Now comes the fun part. Change your pad to a clean polishing pad and once again, working carefully in small sections, begin to polish using the Chroma Ultra Polish. Mark went over each lens a few times to get the level of polish he was happy with. And that's it.

This was probably one of the most satisfying projects. The outlay in materials was not great and while it did take a bit of time, it actually was very straight forward and easy and what a pay off. The difference in the lenses is remarkable. I can't wait to get the frames back and have them reassembled and mounted on the deck. I am going to be able to see clouds with CLARITY! Yippee!
                             
After- HUGE improvement and this is before we cleaned the inside of the lens. Once we cleaned it, wow.
    

Friday, October 10, 2014

Hit The Deck

We arrived home from the airport and were back at the boat within an hour. We had a bit of a breather but now it was time to address the last big topic on the refit- the deck layout.

Ceol Mor is a really great sailing boat. Bob Perry knows a thing or two about designing a boat which is balanced, comfortable and sure footed. Previous owners of Ceol Mor ostensibly purchased her because of the way she moves under sail. So why exactly did they undersize the winches then add a Bimini top whose frame fouls the winch handles constantly and, run lines so they aren't in the most direct line, have a track that does not allow the genoa cars to be adjusted without a set of power tools and a hammer and have a traveler that is pretty much inoperable? The only thing I can figure is they like a challenge. I like challenges too but fighting my boat just to adjust the sails is not one of them. Also, deck hardware options have a come along way since the 1980s and just the progress of line clutches alone warrants some redesign work on an old boat, Fortunately, Captain Perfecto feels the same and as a bonus he has mad engineer skills so after a long design process, it was time to get busy.

Painted and prepped and ready to go

With Mark's spudly wiring conduit and mounts installed to support the new NavPod, the turtle shell painted and polished, it was time to address the traveler. We removed the track and end blocks and had them re-anodized. Once we got them back, Mark began putting together his new design for the traveler car.
Stainless steel mounting plates made by Mark with, you guessed it- his beloved angle grinder.


 Being Captain Perfecto, he of course had to make his own part (which we will call a thingamabob) out of a stainless steel bolt. With an angle grinder. By hand. I am both proud of his design and craftsmanship abilities and terrified at his enjoyment of a successful outcome. No Mark, I do not want stainless steel davits hand crafted by you. I want to go sailing already. They would undoubtedly be beautiful and perfect and would take months to construct so...no.

From this, to this. No one can ever accuse Mark of not being patient.
In preparation for the installation for the deck hardware, we prepped the cabin top deck area for painting. No sense in mounting the hardware on a beat up deck that will have to be removed again soon for painting anyway, just get on with it bit by bit from the get go.

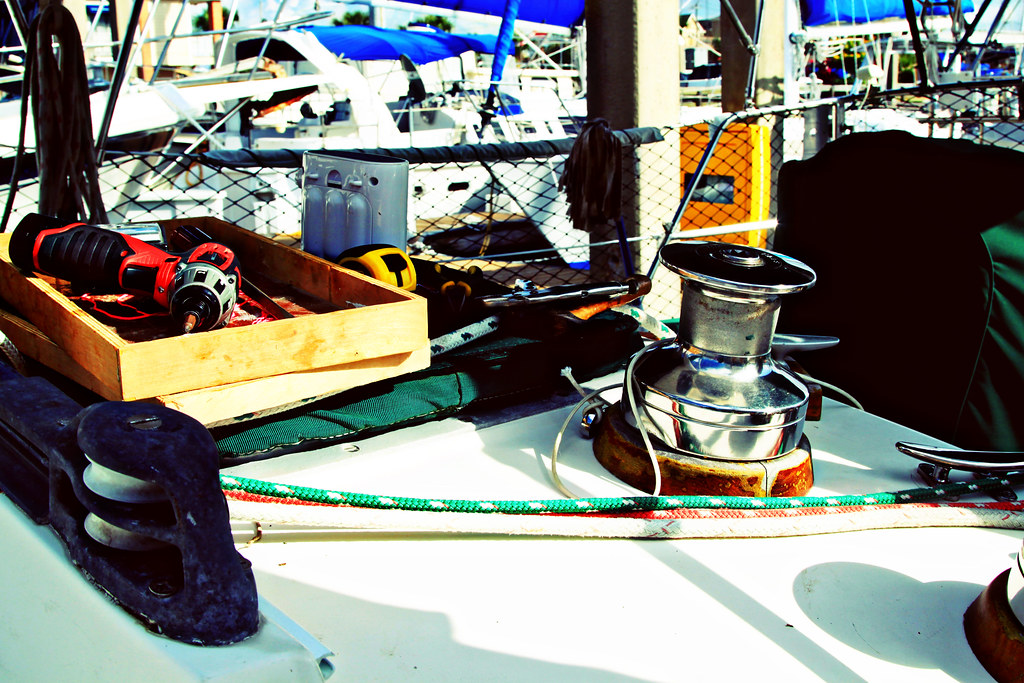
 We removed the hatches to have the frames bead blasted and re-anodized and started taping. It sounds like such an easy thing, taping. In actuality it took hours and hours to get it all done just so. The actual painting it self, using Awlcraft 2000 went fairly quickly. Thanks to the ability of Awlcraft to be sanded and buffed, we were able to get a finish we were happy with. Getting the spray gun to give a finish took a bit of time and patience but again, one of Mark's strong qualities is patience. We are giving it a bit of time to get a good cure on it before we get finicky with the paint line edges in preparation for painting the lower portion of the decks once we are ready to address the genoa tracks.


We had such a (ahem) good time spending countless hours taping, that we got to retape the deck in reverse to freshen up the non-skid areas. We used Awlgrip as that was there originally. We maybe aren't 100% happy with the amount of texture we got with the Awlgrip and Griptex. I think we made an error in going with the fine but we can make do for now. Just have to remember to wear proper shoes with grip until we can readdress this down the road. I think we are going to do a bit more research on Kiwigrip as we have friends who have used it with great success. The best is the enemy of good enough so we are moving on...

With the hatches out for refurbishment, it was time to address the hatch lenses. They were cloudy from UV damage, scratched from years of use and stained a bit from determined birds. It took a bit longer to get the lenses polished up, but polished up they are now. They look like new. Can't wait to get the newly anodized frames back, reassemble and rebed them. The difference in clarity and light through the lenses after attention is massive. Unfortunately, now the Sunbrella hatch covers are looking really sad so it's time for me to sew up some new ones.


We've gotten Kitty into a morning preschool twice a week and she is really liking it. When she isn't at preschool, she spends a lot of time on the boat with us. She spends a lot of time drawing pirate treasure maps. She gives them out to dock friends here and there, admonishing them to keep it secret. She's been through enough of a refit to wisely tell the potential treasure hunters that she will help them find the treasure by sailing with them on THEIR boat. Hang in there little one. We will be able to sail to find treasure with Ceol Mor very, very soon.


I can't see us having the boat back together in a month, but we are making steady progress and there is light at the end of a seriously long tunnel. I can see us having Ceol Mor back together, in tip top shape and ready to sail very soon indeed.


Monday, August 11, 2014

My new found career as a stripper

No, not THAT kind of stripper. That kind of stripper would ostensibly have a lot more cash and not be covered in a mixture of sweat and teak dust. I have been spending far too much time stripping the little bit of teak we have around the companionway hatch and cockpit in preparation for a brand new coating of varnish.

See, Mark started the fabrication of a navpod to fit over the companion way. This will allow us to see our instruments easily, not block our view and not give us the claustrophobic feeling that a big navpod attached to the binnacle in a small cockpit would. Well since Mark was improving things around the cockpit, I thought I would continue the theme by doing something about our peeling, flaking and tired looking teak hatch trim and companionway doors.
Mark and Kitty work on the navpod mounts

The interior of Ceol Mor is kitted out in beautifully finished teak. The small bit of exterior teak was not quite so beautiful. Flaky bits of varnish lifting off the teak to display bits of weathered grey here and there to contrast with what once was beautifully finished teak. A decision had to be made. Either let it all go grey, live with a hodge podge mess of finished and non finished teak or get busy redoing it all.

We have friends who have left their teak to weather naturally. I can understand the appeal of taking the path of less resistance because redoing the brightwork is a pain in the butt. This is probably the smartest route to take but when have I ever claimed to be smart?

 Ceol Mor does not have a lot of exterior teak so just letting it go felt a bit lazy. I also have an ulterior motive. One of the totally-not-necessary-to-cruising items that is on my wish list is to have the hull painted and have our tired canvas replaced. It will be easier to make a case for going to the expense and bother of repainting the hull eventually if the teak is in beautiful, shiny condition to contrast against the aging hull paint. Always thinking ahead....

And so I have begun this project in earnest. Step one- strip off the old varnish.

Since this is my first go round of redoing the brightwork, Mark and I thought it would be a good idea to try to different methods of stripping the wood to see what worked best.


My first attempts were using Circa 1850 stripper . Now this is indeed, powerful stuff. It will strip off any old lacquer, stain or varnish. It will also eat through reputedly chemical resistant gloves and despite your best attempts to work in a meticulously tidy manner, there will be a tiny drop of stripper that will be launched by a brush stroke which will land on your skin, raise a blister and burn like a m@#h3r. This will happen more than once. If you are going to use this stuff, you MUST use heavy duty neoprene gloves. A hazmat suit would also be a good idea. Personally, I would try every other method first. This is nasty, nasty stuff. Also when they tell you it will only take one coat they are lying. Lying lying lying. There is a use for it , in small areas where you just can't get a heat gun and stripping knife in there but the toxicity of the stuff coupled with the huge, gooey mess it makes makes other methods much more appealing.


I found using a heat gun and knife MUCH much more enjoyable. Except for that one time Kitty came running up and I pulled the hot gun away to be sure I did not burn her. Instead I gave myself a brand right above my knee. That was less than ideal. Still, the heat gun is a much better method and aside from burns you don't have the worries of chemical burns or bits getting into the water killing every fish for a mile.

Mark asked me how I was getting on with the gun and was I managing to not scorch or burn the wood? See, here's the thing Mark... What you call "scorching" and "burns" I call patina. I did accidentally add a bit of patina to a thin, raised bit of teak trim on the companion way door panel but that should just buff right out. *ahem* Just a friendly reminder if you go this route to keep the gun moving on those small, tinder sized bits of wood unless you love um, patina. That's it, patina.

Once the old varnish it was time to sand.
And sand.
And sand some more. Day 4 or sanding and I am beginning to rethink my previous conclusion that Ceol Mor only has " a little bit of teak". I also begin to rethink my love of old wooden boats with gorgeous brightwork and start to think all the newer production boats with no teak whatsoever are starting to look more and more attractive.
Change to a finer grit paper and sand some more.
And sand.
And sand.
Whoopie! We are up to 320 grit paper and again with the sanding.

Once I had gotten everything sanded smooth, cleaned and degreased and stained, it was time to move on to the really scary part- varnishing. Why was I frightened? Because I am very aware that if the humidity does funky things or my application is not just so I have to go back and strip everything again and start over. Not a thought I wish to entertain. Like, ever.

After much debate we decided to go with Interlux Perfection PlusThis is after everyone near and far suggested their personal favorites. In the end, we decided to trust Practical Sailors recommendation for longevity based on their testing. We will see how it goes.

I've gotten the first coat on the companionway hatch trim. Coats 2 and 3 will be applied today, then 4 and 5 tomorrow followed by 6 and 7. Then it's on to the doors, then finish up the stripping of the hatch on the boat. I doubt it will all be done until after we return from an upcoming trip (to escape the heat) but fingers crossed it will all be done by mid Sept at which time I will post photos.

Until then, I am off to sand some more.


Saturday, August 3, 2013

Inch By Inch...


...the refit keeps moving on. We lost a full week due to Mark having to be out of town but hey, they pay him for these little jaunts so we try to take it all in stride. We like the refit to keep moving forward but a paycheck is necessary for this to happen right now so a week behind schedule? Schedules are for airlines and even they aren't capable of sticking to one. Keep on keeping on...

We've reached a point where we can start whipping the engine compartment into shape. It, like every other hidden bit of the boat was a mass of poorly routed hoses and random add ons taking up twice as much space as necessary. Since Ceol Mor is an aft cockpit boat, we do not have the luxury of a big engine compartment so making this area as tidy as we can is a priority. We have an old faithful Perkins which should out live all of us but in order to make that happen, we have to be able to tweak and coax her into chugging along with early and often maintenance. Having the engine be as accessible as possible will be appreciated the first time we have to do some engine trouble shooting and repair at sea. Notice I did not say 'if', I said 'when'. It's inevitable so it makes sense to plan ahead.

Before
So the old hoses which ran every which way, were unsupported and had mismatched hose and bar sizes have been replaced, rerouted, clamped, checked and organized. The old filter installation which compounded the clutter due to having separate sea water and fuel filters for the engine and generator have been replaced by a single seawater filter and manifold which supplies both the engine and generator.A dual fuel filter and manifold has been installed to supply the engine and generator. Mark designed and built the fuel filter assembly which includes valves for fuel polishing and online filter replacement and selection. Everything is labeled to identify valve function and position for various operating modes (no guessing!).We have installed new sound insulation through out the compartment.


After
If we ever do have to repower, it will seem like a piece of cake after all of this!


Kitty loves nothing more than helping with the boat. She is our quality control inspector.


Friday, June 7, 2013

Rites of Passage


Its summer. Despite the fact that the calendar says its is not yet officially summer, the fact that the daily temperatures are flirting with the notion of spiking upwards towards the 100 Farenheit mark means its summer no matter what the calendar says.

Maura has indulged in the American teen rite of passage of running around with friends, swimming and catching up on all the tv she missed during the school year. Kitty enjoys the summer rite of passage of dancing in the sprinklers as they make a vain attempt to keep the green stuff from turning a crispy brown. Sailors have rites of passage too.


The first rite of passage is for your surveyor, no matter how good and how thorough to miss something big on your pre-purchase survey. This will be monumentally time consuming, or expensive or both. Happens to everyone. Expensive miss? Check.

Another sailing rite of passage is to have your engine fail at a time when it would be a really good thing to have your engine. Like when coming into a narrow, busy marina lane and no, boats do not have brakes. Check.

Then there is the first time overnight at anchor when you hear the weird bacon sizzling noise of tiny crustaceans doing god knows what around your hull.Check. Running aground. Check. Ripping a sail. Check. Anchor refusing to set/dragging. Check. See? These are all rites of passage that everyone who sails will encounter eventually. We are no more cursed or blessed than anyone else. I just figure its all part of it and make a check list to count down the inevitable.

With the heat coming on gang busters, we had the opportunity to experience yet another rite of passage. In order to keep the refit moving forward, it is an absolute necessity to run the ac while sitting in a windless marina. An ac that requires an intake through hull. An intake through hull that will eventually, suck up some poor unsuspecting sea creature to its demise. I was hoping we would get a squid because they tend to be squishy and a little easier to extract but no. Our sea creature is of course an over achiever so what did we get? A big, fat  fish. That sucker was seriously wedged in there.


Mark tried everything he could to get the fish out without resorting to cutting the lines. He tried working on it from the outside, the inside, from every conceivable angle but in the end- due to a 90 degree angle, the lines had to be cut in order to remove the now very dead fish. Mark was annoyed that the intake was designed in such a way that he could not rod out the intake. You know what that means. he is busy redesigning the intake/strainer set up to avoid this. Ceol Mor will be getting a completely redesigned ac system that will allow rodding of any and all through hulls.

Refit project list expanding project by project despite your best efforts to whittle it down? Check.

Saturday, October 27, 2012

Chasing down a leak...


You know you are really and truly a boat owner when you get the privilege of spending 2 or 3 days chasing down a mysterious leak. After a very hard bit of rain, there appeared a leak on the aft cabin berth. Perhaps it was the winch seating? Nope. Both winches above the cabin look to be okay but we did find a bit of old deck rot which must be attended to. No answer to the leak but yet another project on our non-project boat. Maybe its the traveler? That needs to be reset anyway, lets have a look. Nope...not there. Portlight? But we just reseated those and while Mark is not the fastest worker in the world the man is thorough. After 2 days of dismantling everything and putting it back together we have come up with the answer- maybe it is the winch after all. Or maybe not. We will have to wait and see.

The good news is that Kitty was around to assist for a lot of the leak chasing. She found this very exciting as it involved hammers AND screwdrivers. She offered her opinion on our work while Mark and I loosened bolts, then retightened them. Again. And again. The she was off screwdriver in hand to check every bolt and screw on deck. Kid has a bright future in a boat yard somehwere, She didn't miss a single one.

Why yes, that is a different pirate costume. This one was purchased after her previous one literally fell apart from wear. She was a little upset that this one did not have what constitutes a proper hat but was placated when she figured out her head scarf included earrings. I am just hoping this one lasts until Halloween...


Tuesday, August 21, 2012

Last minute chores....

If the weather powers that be cooperate, we should be leaving tomorrow for a little mini cruise. Most sailors refer to these little test runs as "shake down" cruises. Its a chance to see how the boat and equipment are functioning and to ensure that all systems are go before heading out far away from chandleries, shops and marine repairmen.

 I like to think of our little jaunt as a "Suck!!" down cruise. As in, 'we do not have XYZ on the boat and man does it ever suck'. Take for instance the fact that currently our water tanks are not plumbed as we await checking the refurbishment of the water system off the check list. So we are going to have to jug the water which is not ideal at all but it will work.

What should add to the suckage is the unmerciful heat we have just now. It is stupid, stupid hot. Hovering right at 100 Farenheit in the afternoon and if you are in the sun it feels even hotter. I've never been one to perspire in a dainty manner and you can't say I sweat like a pig because pigs do not sweat. I sweat a LOT. August in Texas usually means I am absolutely covered in a thick sheen of perspiration. This is why I perpetually look as if I have just stepped out of a swimming pool in summer. I am just trying to function while my face is melting off. Jumping in for a swim to cool off isn't really an option. The visibility of the Gulf of Mexico water here on the Texas coast is about 3 inches. I do not mind swimming in the ocean unless I cannot see what/who I am swimming with. That kinda skeeves me out. So Sweaty Betty I shall be. I figure if I can keep a happy disposition while I am being baked to a golden crisp by the sun, with no opportunity to rinse off the sweat, with a cranky and hot preteen and toddler on board I can do anything.

We are ticking off last minute items of our check list. One of the big ones was removing our main sail (Baggy MacBaggerton) to replace a missing batten and patch up the batten pockets which had torn. Poor sad little sail. It has seen some abuse in its lifetime and now as it winds down its career its like an aging athlete who is held together only with tape, physical therapy and an iron clad, unescapable contract. Hang in there Baggy, you shall be retired soon.

Mark took photographic evidence of me actually sewing a patch on the sail. Me sewing, by hand with the evil sail palm which refused to sit properly on my hands and insisted on rubbing my hands raw. My sewing machine is no longer my arch nemesis, the sail palm is. Seems no one makes them small enough for people with T Rex hands such as mine. Its like shoes- if they are too big you get blisters. Thank goodness Mark took pity and finished the other patch up.

So we are off to put the main sail back on, finish up the last minute items, check off the provisions list, load up the boat and tomorrow we head out to see how we do. How long are we off for? A couple of days then its back home to port to put the final items on our work list for the boat to shorten the suck list.

14 months....

Sunday, August 12, 2012

Things that make you go #@&%!!!

Ceol Mor had a life long before our stewardship and hopefully, she will have a long life after our time with her. While some items on Ceol Mor have suffered from previous owners attempts at maintaining her (nobody is perfect after all), there are plenty of areas where you can tell she was well loved (the interior for one). Since we want to be certain that when Ceol Mor leaves our care she is in better condition than when we got her we always do our utmost to use the best practices to keep her as close to Bristol as we possibly can. Okay, so right now she's not exactly Bristol fashion yet but she is well on her way.

With this in mind, we did careful research on how to best keep her Awlgrip painted hull shiny and pristine. After much research, we decided to take the hit to the pocket book that using the manufacturers recommended cleaning product Awl Care would entail. Boat soap is cheap, Awl Care, not so much but if that is what will best care for her paint job then so be it.

We carefully followed the directions, washing with Awlwash then painstakingly applying the Awlcare inch by inch, buffing by hand as directed. It worked beautifully at removing the dirt streaks from the hull and shining her up to a glossy finish. We were chuffed!

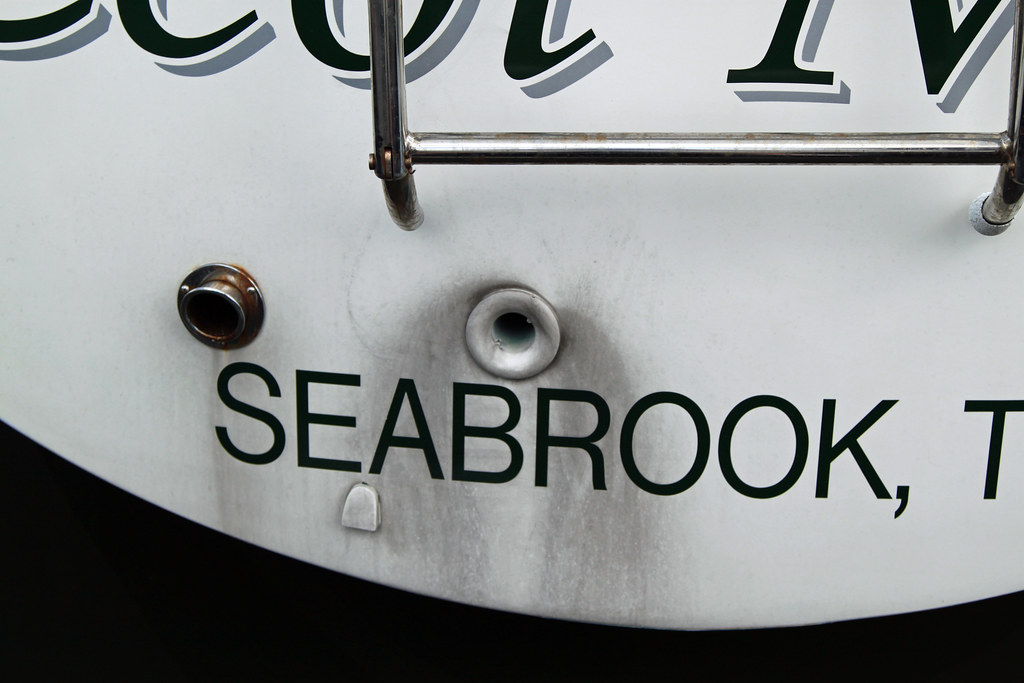
Imagine our disappointment after that expense and great effort to find that while Awlcare does in fact clean as directed, the protective polymer coating actually attracts dirt and soot. Quickly. I suppose its smart marketing on Awlgrip's part. Yes, Awlcare works but if you aren't willing to spend 5-6 hours twice a week and a bunch of cash to continually use it your hull will look worse than it did before. We are down with spending time cleaning the boat but not hand buffing a 42 foot boat non-stop. We'd like to you, know, have time to actually SAIL. Regular cleaning is fine, as is buffing the entire boat every month or so but this photo shows what happens just a week after polishing the hull and after regular cleaning.
Exhaust soot staining the Awlcare polished hull after about 15 minutes of engine run time. :(

I told Mark that someone, somewhere has the answer to our dilemma we just haven't come across it yet. We have a metric butt load of readers and I am really hoping that one of you out there has a workable solution for us. There has to be an easier way. If it weren't so darned hot, I'd just paint the hull Flag Blue and be done with chasing streaks.*sigh*


In other spic and span obsession news, Mark continues to try every device known to man to keep birds and their accompanying poop off the boat. I long ago made peace with the fact that the only workable answer was to shoo them as often as possible and just be prepared to clean the decks. This is our plastic owl, which Mark continues to cling to despite having given up on a Bird Spider, bits of metallic tape and numerous other bird frightening implements both purchased and built. Mark is still not taking my advice. What we need is a cat. A big old boat cat. Anything else is folly.